Understanding authentication in Blazor and ASP.NET Core - Part 2
In this post, we will briefly delve into the concept of authentication and explore how we can swiftly implement a basic version utilizing cookies in ASP.NET Core and Blazor.
What is authentication ?
Authentication is the process of verifying the identity of a user or system attempting to access a resource or service. It ensures that the entity requesting access is who they claim to be. This verification typically involves presenting credentials, such as a username and password, and validating them against a known set of credentials stored securely. Authentication mechanisms help secure systems and protect sensitive information by ensuring that only authorized users can access protected resources.
We will refrain from delving deeper into this topic as the reader is already familiar with its details.
What is Blazor ?
Blazor is a framework for building interactive web applications using C# and .NET. It allows developers to create web applications entirely in C# without needing to rely on JavaScript for client-side functionality (like React or Angular). Once more, we will abstain from further elaboration on this subject and encourage the reader to explore dedicated books or blogs for more advanced concepts.
To be frank, we are not Blazor experts. Our focus here is solely on exploring the authentication capabilities provided by this framework.
Establishing the environment
Now, we will proceed to configure a standard Blazor environment within the Visual Studio 2022 IDE. This basic application will serve as our foundation for gradually elucidating the underlying concepts.
- Create a new solution named EOCS.BlazorAuthentication for example and a new Blazor Web App project in it named EOCS.BlazorAuthentication.Main.
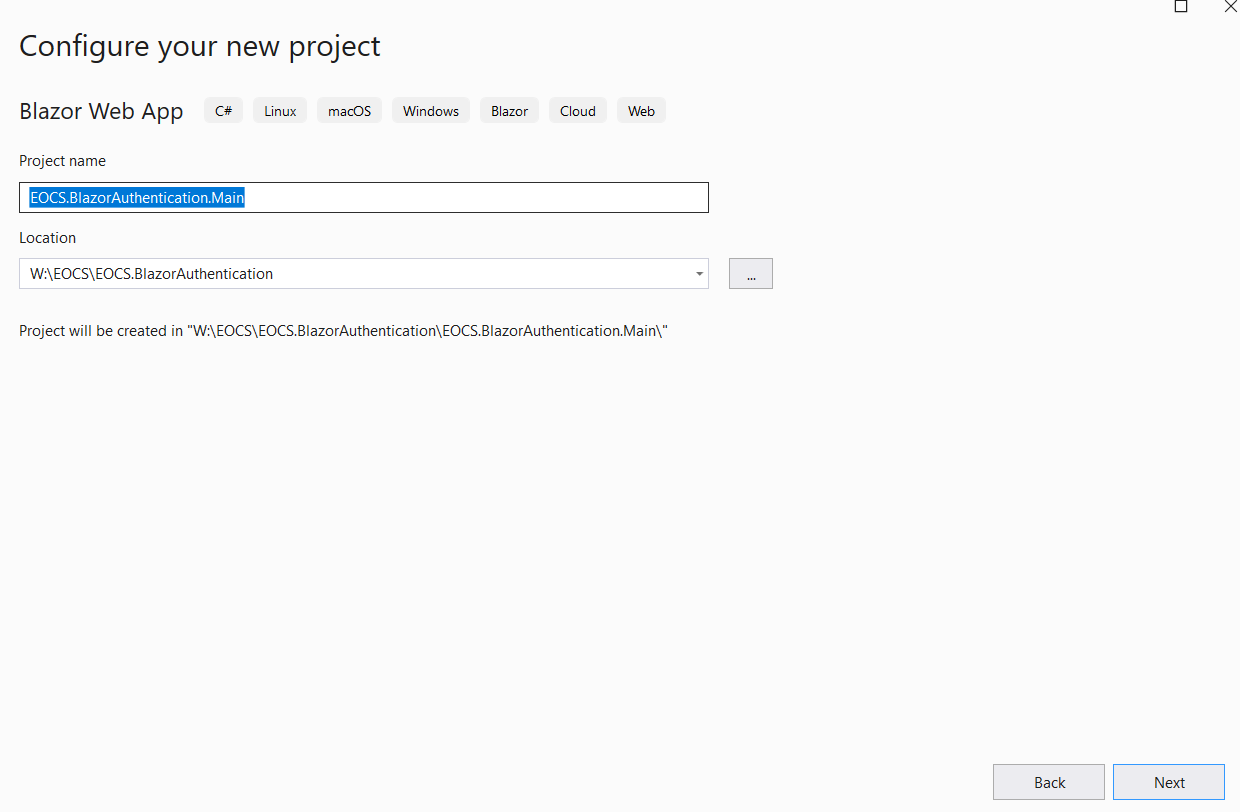
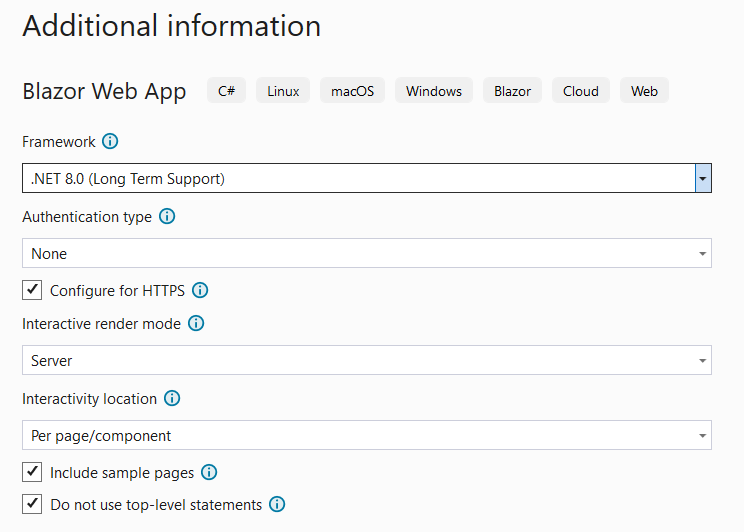
- When adding information, ensure to select "None" as the Authentication type, "Server" for the interactive render mode and to check "Include sample pages".
- Run the program and verify that it is possible to access all routes without the requirement for authentication.
In this series, we are utilizing the .NET 8 version of the .NET framework.
Our objective now is to demonstrate how to seamlessly integrate authentication into this application, ensuring that only authenticated users can access its various pages.
Adding authentication
Incorporating authentication entails creating a login page where users can authenticate their identity by providing credentials. Additionally, it involves specifying that other pages cannot be accessed unless the provided credentials are verified as correct. Let's explore these two aspects in detail.
Creating a login page
- Add a new Razor component named Login.razor to the application and add the following code in it.
1@page "/login"
2
3<h3>Login</h3>
4
5<form action="" method="post">
6    <button type="submit" class="btn btn-primary">Login</button>
7</form>
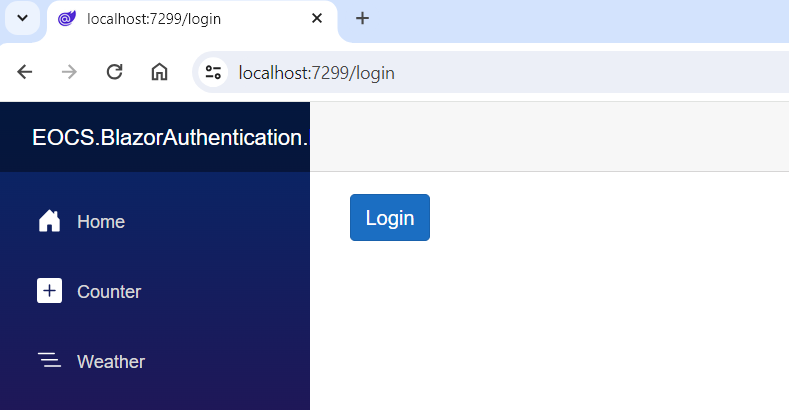
- Run the program.
We can readily observe that a new page has been seamlessly integrated into our application, accessible via the /login URL.
Specifying that other pages cannot be accessed
Up to this point, all existing routes remain publicly accessible. We will now enforce access restrictions to ensure that only authenticated users can view our pages.
- Open the Routes.razor file, add the [Authorize] attribute to it and edit the content with the following code.
 1@inject NavigationManager navigationManager
 2
 3<Router AppAssembly="@typeof(Program).Assembly">
 4    <Found Context="routeData">
 5        <AuthorizeRouteView RouteData="@routeData" DefaultLayout="@typeof(Layout.MainLayout)">
 6            <NotAuthorized>
 7                @{
 8                    navigationManager.NavigateTo("/login", true);
 9                }
10            </NotAuthorized>
11        </AuthorizeRouteView>
12        <FocusOnNavigate RouteData="@routeData" Selector="h1" />
13    </Found>
14    <NotFound>
15        @{
16            navigationManager.NavigateTo("/login", true);
17        }
18    </NotFound>
19</Router>
In previous versions of the framework, the aforementioned configurations may need to be adjusted, especially if the Routes.razor file does not exist.
Once this setup is established, every file requiring authentication must be annotated with the Authorize attribute.
1@page "/"
2@attribute [Authorize]
3
4<PageTitle>Home</PageTitle>
5
6<h1>Hello, world!</h1>
7
8Welcome to your new app.
To ensure that the Authorize attribute is recognized, verify that the correct namespaces are imported in the _Imports.razor file.
1@using Microsoft.AspNetCore.Authorization
2@using Microsoft.AspNetCore.Components.Authorization
There are several noteworthy aspects in this code that deserve attention:
Files that should be accessible only to authenticated users only must be globally adorned with the [Authorize] attribute. It signifies that by default, authentication is enabled and must be validated when the page is loaded.
We are employing the AuthorizeRouteView component in the Routes.cs class to define the behavior when a page is requested: in our scenario, any unauthenticated user should be redirected to the login page, while authenticated users are directed to the requested page.
It's worth noting that if a malicious user attempts to access a URL that does exist, they will also be redirected to the login page.
However, upon running the program, an error occurs. What could be causing this discrepancy ?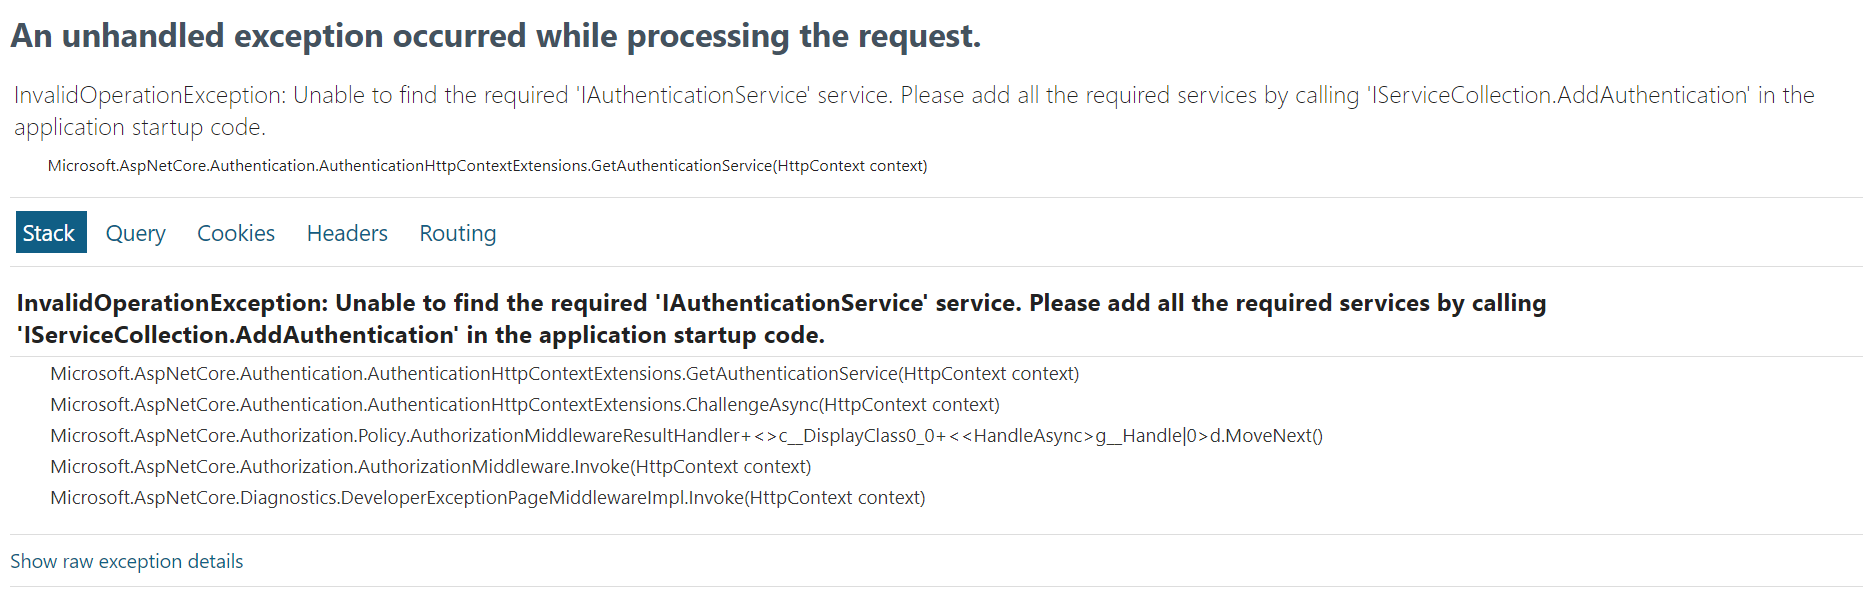
In reality, we haven't informed Blazor that the authentication feature must be utilized in our application. We will see how to do that in the next post.